
Summary
This guide walks you through the main areas of the BuilderPal mobile app so you know where everything is and how to move around quickly.
Prerequisites
Role: Any role (navigation is universal)
Device: iOS or Android mobile device
Access: Must be logged into the BuilderPal mobile app
Steps
1. Start on the Inbox (Home Screen)
This is the first screen you'll see after logging in. It shows updates from your projects.
Use the Inbox to:
View activity across your projects
Open invitations, approvals, messages, and updates
Jump directly into a project or action by tapping any row

2. Use the Bottom Navigation Bar
The bottom bar is always visible and gives you access to the main parts of the app.
It includes:
Inbox – Your main activity feed
To-Do List – Tasks assigned to you
+ – Quick Actions panel
Projects – List of all jobs you have access to
Menu – Global tools + project tools

You’ll use these five buttons to get almost everywhere.
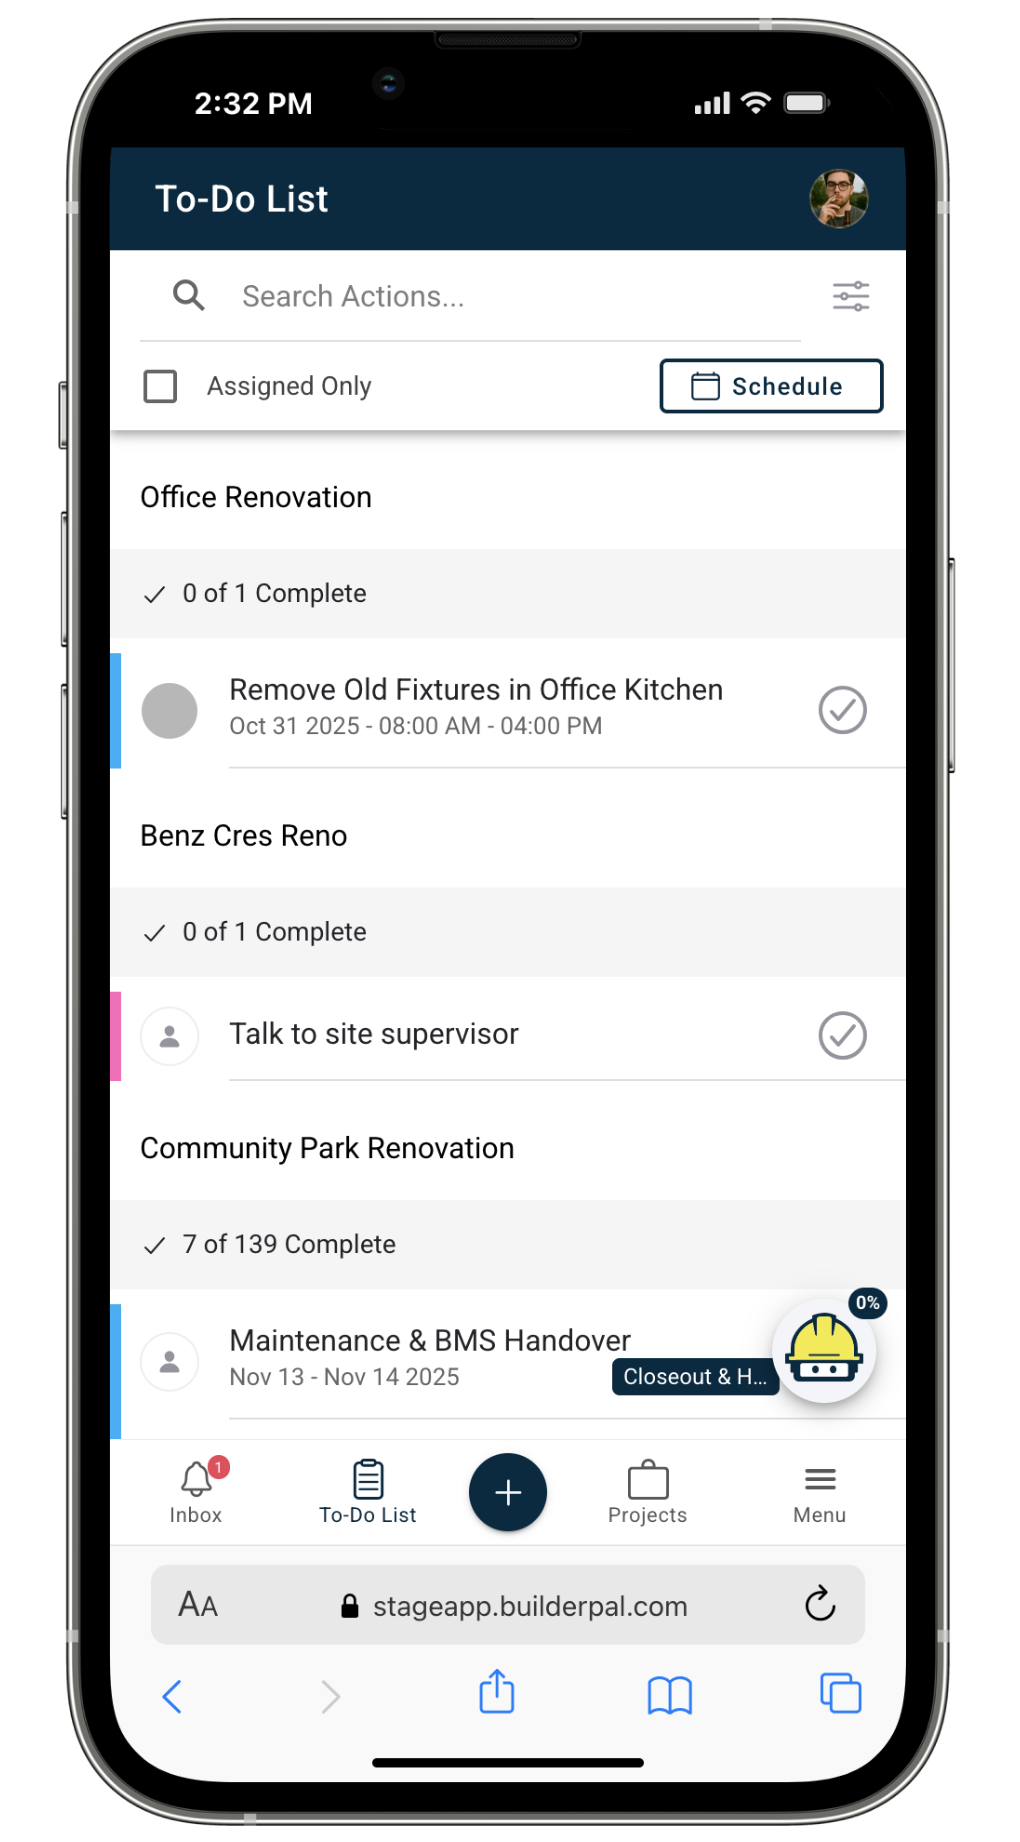
3. Open Your To-Do List
The To-Do List tab shows all personal tasks assigned to you.
You can:
View everything you need to complete
Tap a task to open its details
Jump into the related project or action
4. Browse Your Projects
Tap Projects to open your full project list.
From here, you can:
Scroll through all projects
Tap any project to open it
Use the + Quick Actions menu to open that project’s tools
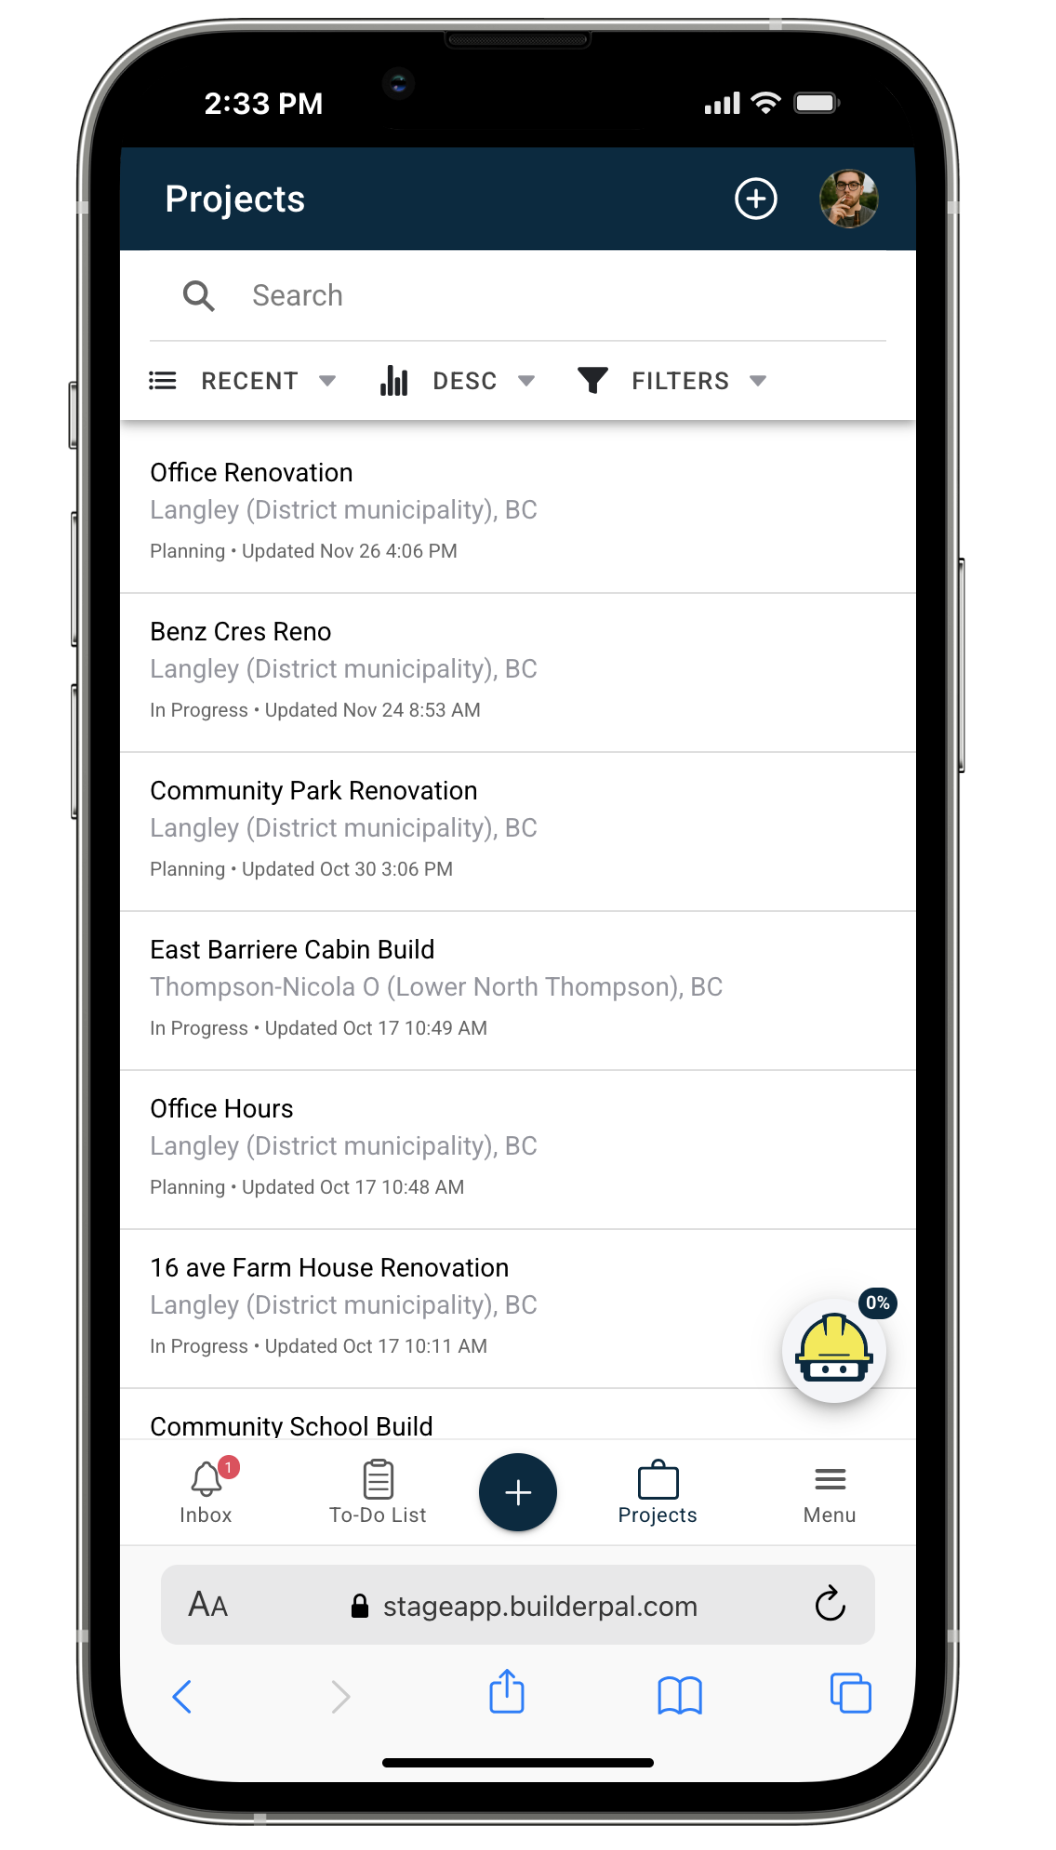
Once a project is selected, it will appear automatically inside the Quick Actions panel.
5. Use the + (Quick Actions) Button
The + button is for creating new items. It does not show global tools or project tools.
When you tap +, you will see creation options such as:
Action
Time Entry
File or Photo
Folder
Contact
Subcontractor
Scheduled Work
Phase
Punch List
Site Instruction
Request for Information (RFI)
Change Order
Purchase Order
Bill
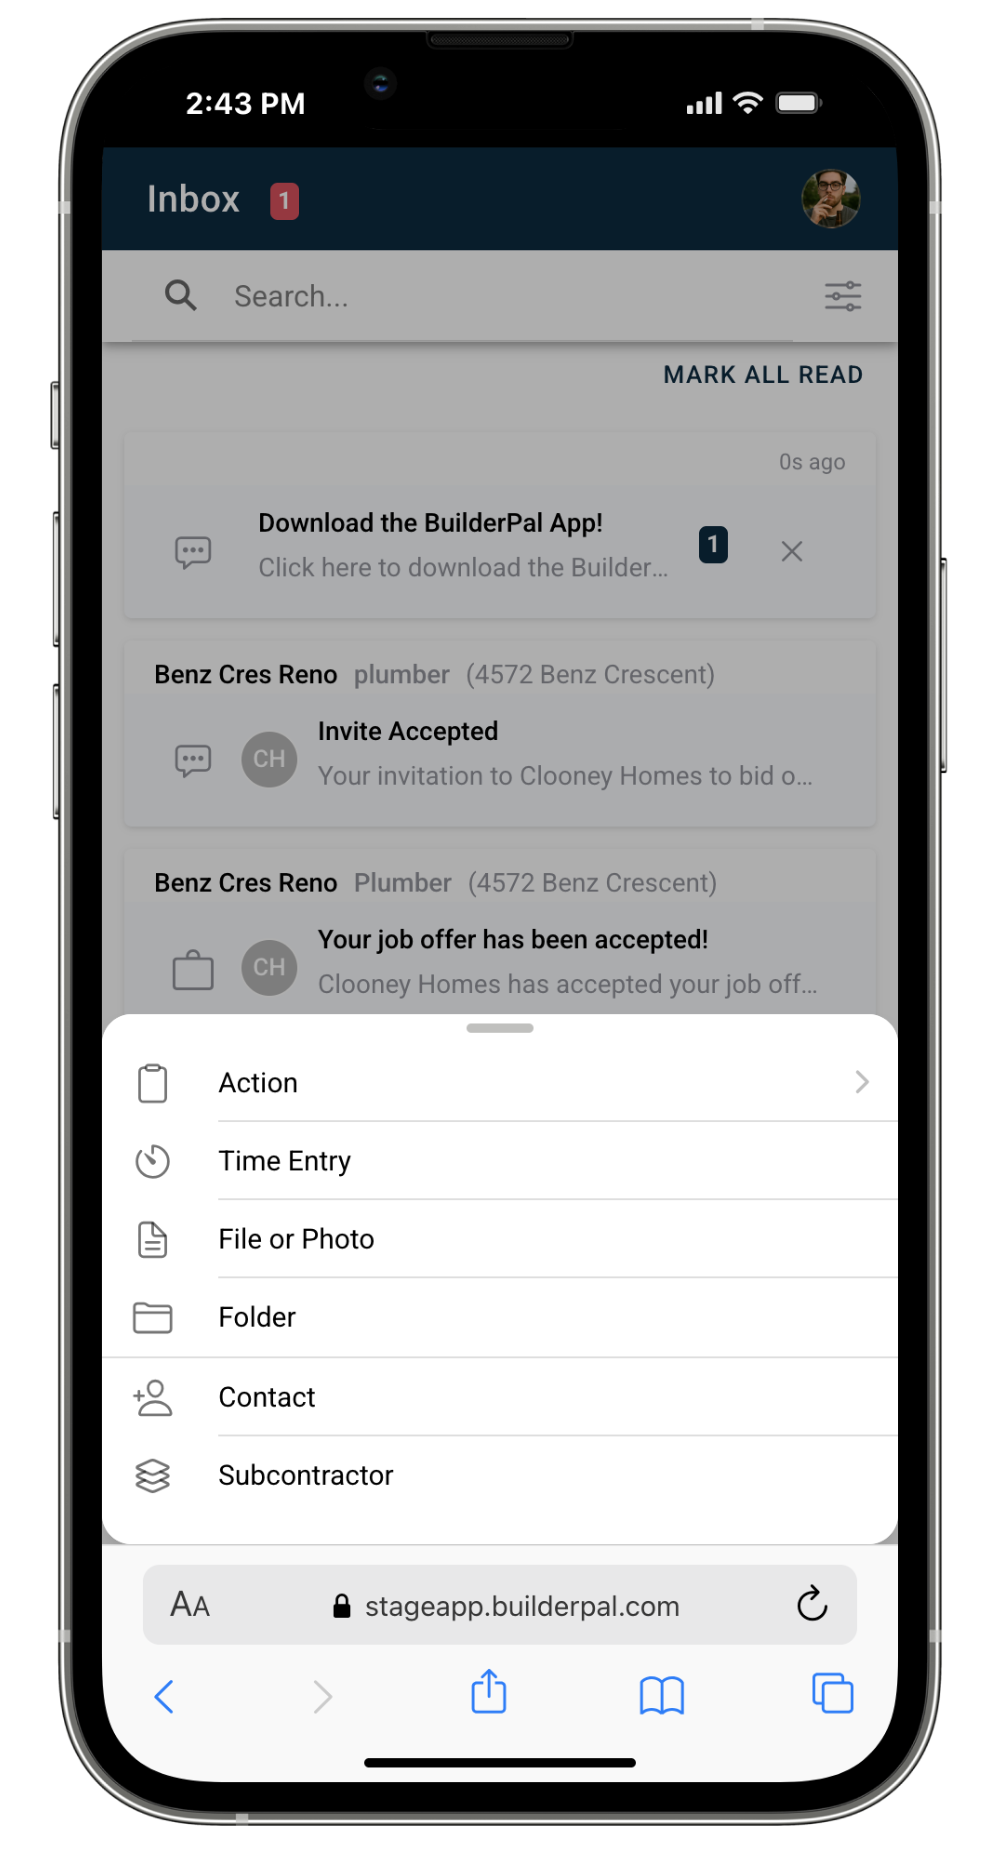
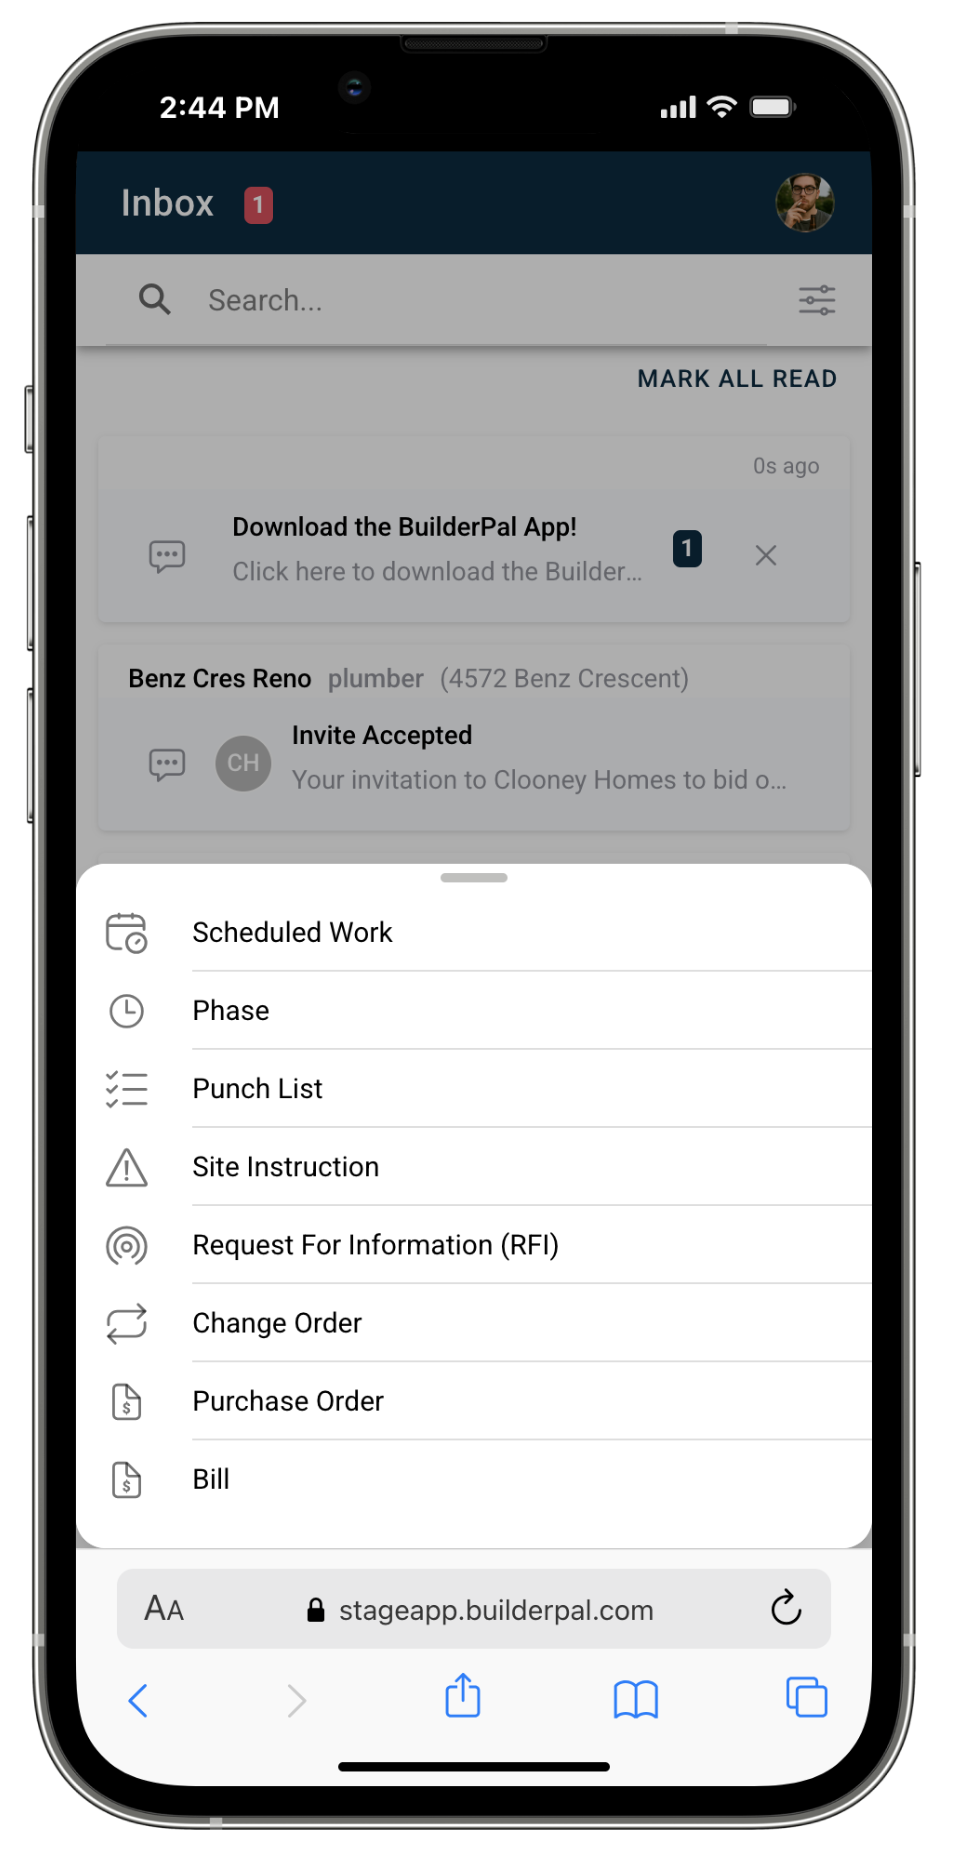
Use this button whenever you need to add something new inside a project.
6. Use the Menu (Project & Global Tools)
The Menu button on the bottom right opens BuilderPal’s full tools panel.
This panel contains:
A. Global Tools (always visible)
Clock In/Out
Job Connector
Team Office
Support
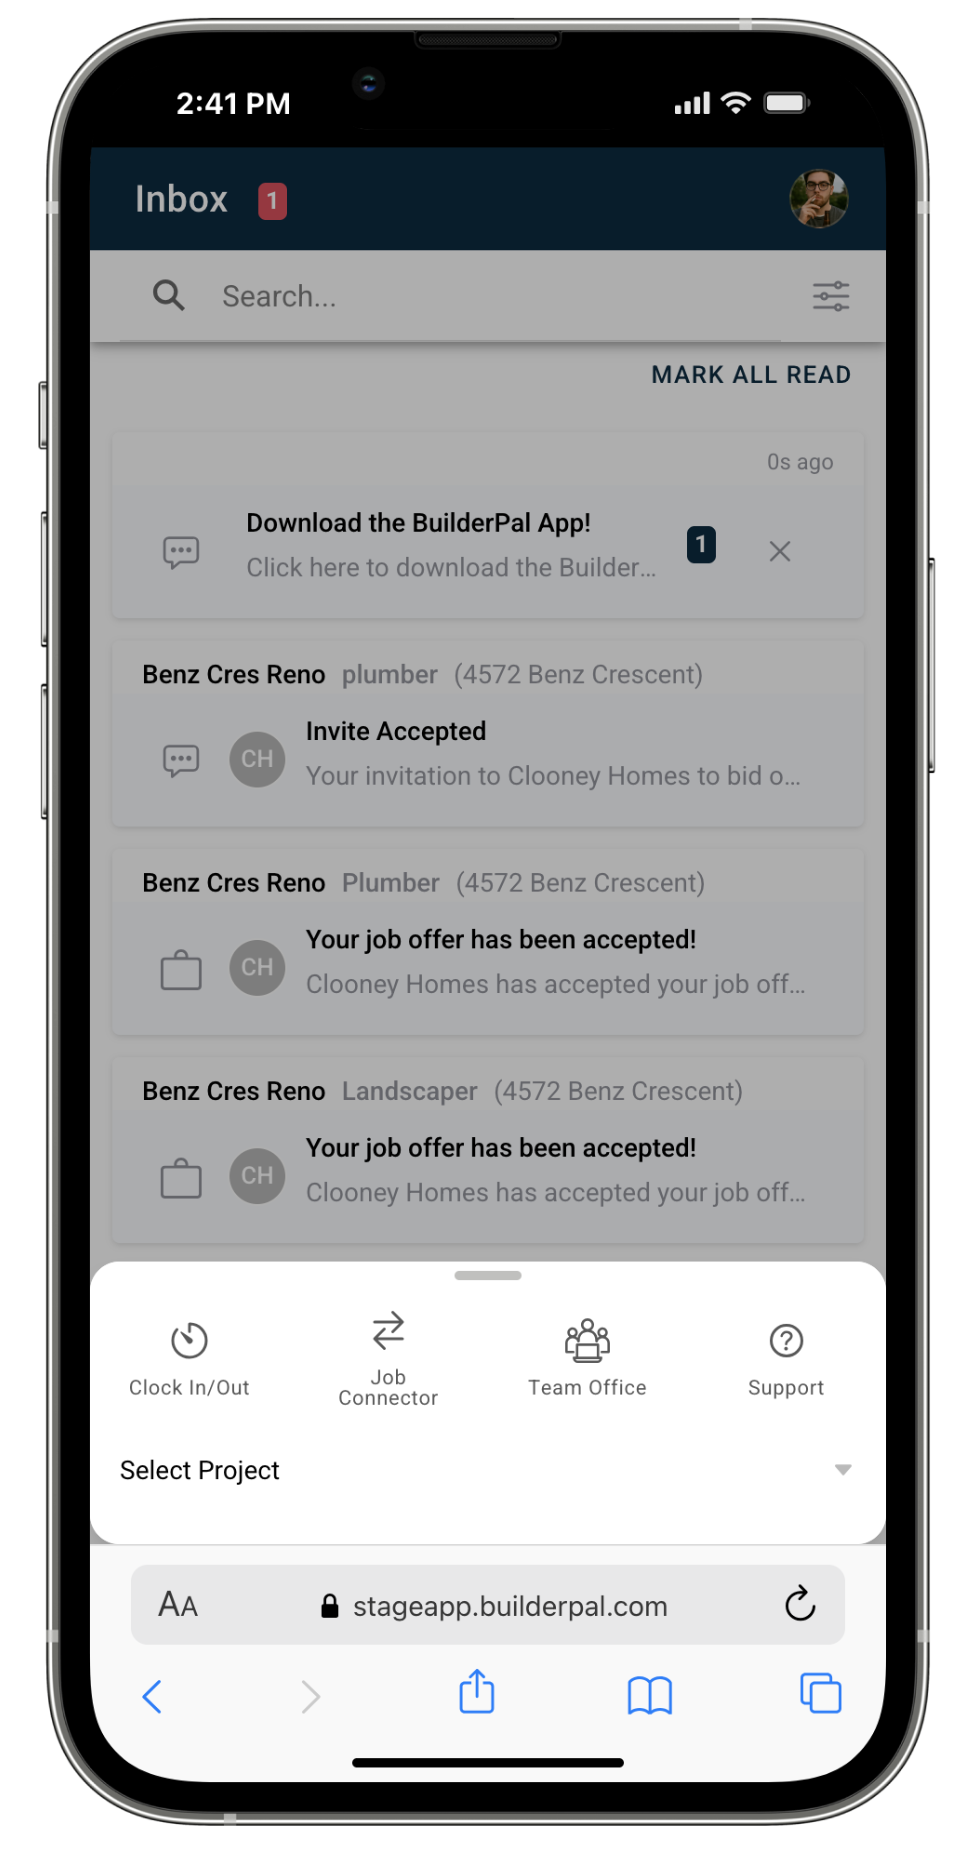
B. Project Tools (after selecting a project)
If no project is selected, you’ll see Select Project first.
Once a project is selected, you’ll see tools for that project:
Overview
Schedule
Actions
Documents
Job Chat
Participants
Site Office

This is where you go to navigate into any part of a project.
7. Accessing User Settings (Profile Icon in the Top Right)
To edit your account details, notifications, or preferences, tap your profile picture in the top-right corner of any screen.
This opens:
Profile info
Email & username
Pro access (if applicable)
Fast Start Guides
Notification preferences
Logout
Account settings are not part of the Menu tab.
Confirmation
You’ll know you understand the app layout when you can easily move between:
Inbox → Project → Tools
Projects → Quick Actions → Overview/Actions/Documents/etc.
Inbox → + → Clock In/Out
Profile Icon → Account Settings
Tips
Quick navigation: Tap any Inbox row to enter that exact thread or project.
Fast clocking: Tap + → Clock In/Out from anywhere.
Project tools: Open Menu or + after choosing a project.
Account settings: Only found under the profile icon, not in Menu.
Related Articles